Do you know you can easily manage your hosting services from your Web Design Labs client portal? This will be useful if you have not saved your hosting Control Panel password somewhere safely (or do not remember) but can log in to your Client Area. Not only that, there is a lot more to discover.
In this tutorial, we will discover those options.
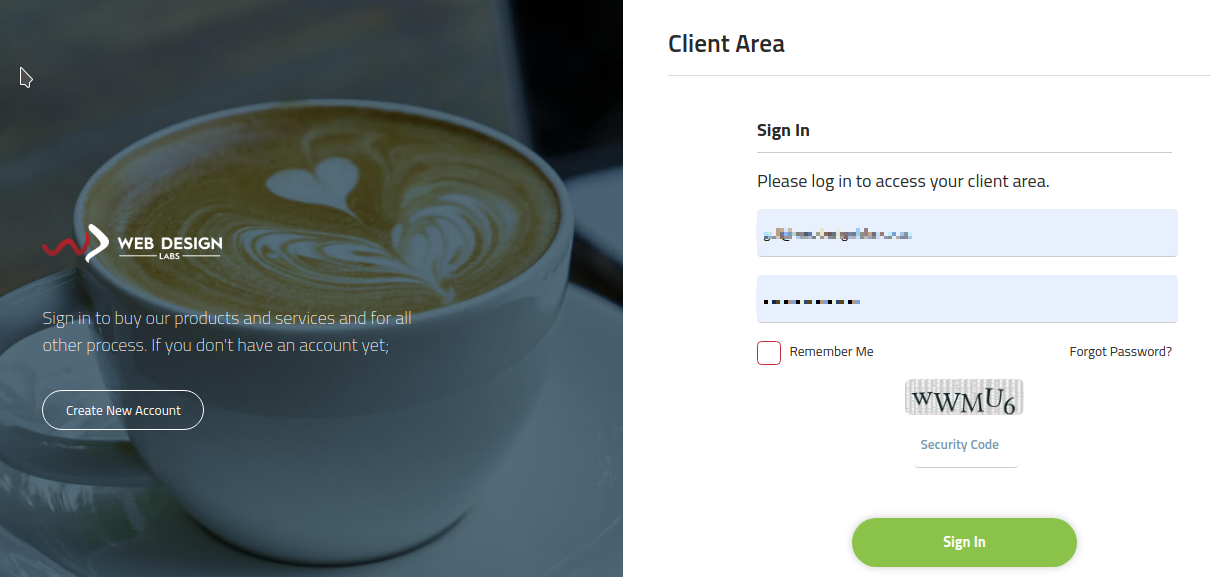
1) Log in to your Client Portal at https://www.webdesignlabs.co.za/sign-in.
2) To view your all services on a page click on the rocket icon on top (green tile) (option A) showing the number of your services (in this example, 2 of them) with the Product & Service title or for managing the service individually (option B), click on My Services on the left pane of your portal and then click one service at a time as shown – this will then only show the service you like to manage.

3) This is what you will see if you select the first option, option A (click on the green title/rocket icon):

The only difference between options A and B is that the latter will only show you the service on which you have clicked. In option A, both are displayed combined.
4) You can click on the Manage button next to each service one by one or open the second one by right-clicking it and opening it in a new tab.
Managing Web Hosting Services (My Services > Web Hosting)
For managing your hosting service, click on Manage (shown as number 1 in the above snippet). The following page will load:

Details tab
The first tab (Details) will be shown with brief statistics of your hosting disk and bandwidth usage, the Control Panel name and logo (this could be any other panel, like Plesk which we provide for our Windows Developer Hosting) with the domain name just below it, the panel and webmail login buttons above the service renewal button. You can log in to your Control Panel directly from here (SSO/Single Sign On) or launch the webmail to log in to your email account (if you have its password handy).
Scrolling down further will show General Information for your hosting package, Features, FTP Access Information, and Name Servers:

Please note that it also shows the hyperlink for your corresponding invoice number associated with your service and an eye icon at the bottom left which will reveal the FTP password when clicked.
Additional Services tab
This will show your add-on(s) if purchased or if offered.

Upgrade tab
This will show you the options to upgrade the service (to the packages in the drop-down menu “Upgrade to:”) with your existing service’s creation/renewal date, time used, and time remaining:
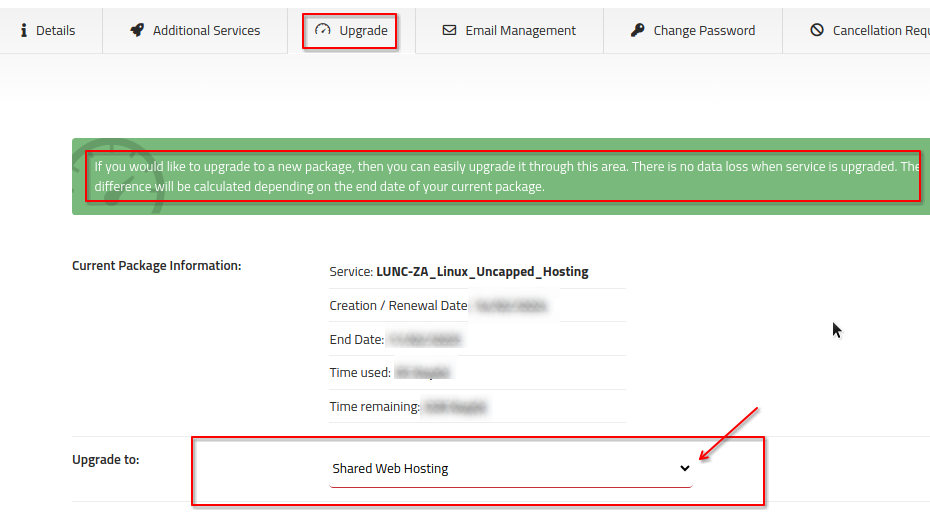
Clicking the category on the drop-down menu will show you the relevant packages which belong to that category. Here, choosing the Shared Web Hosting category will show you the following packages for this category:

For WordPress Hosting:

and so on.
All you have to do is choose your package and Click on the UPGRADE button at the bottom of your chosen package. The rest of the process will be simple.
Email Management tab
The next tab, as the name says, is for managing your email accounts from where you can add new accounts or list the existing accounts:
Adding new email address:
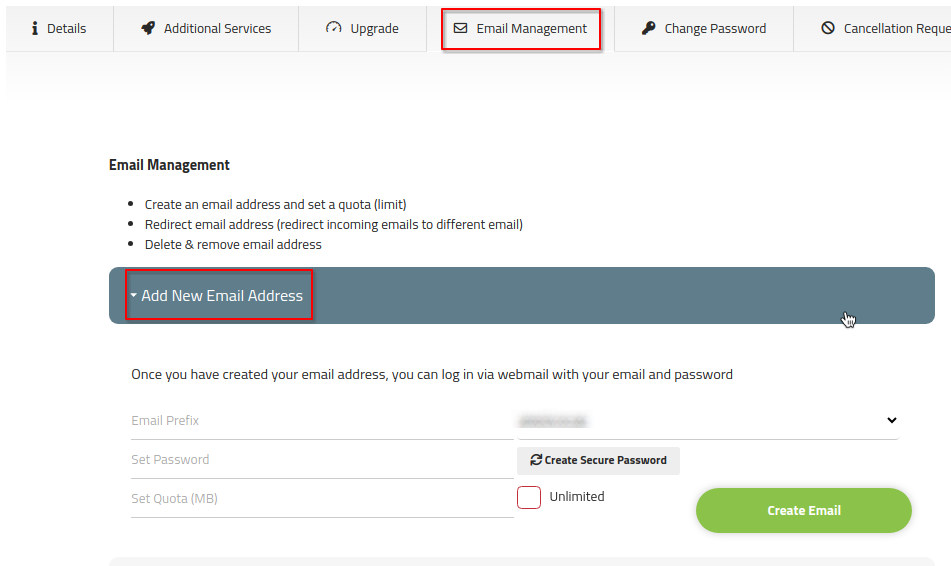
(The unlimited quota box shown is just for example, or if your hosting package has unlimited quota for your email accounts under your assigned/fixed quota for the whole hosting account)
Listing Existing Email Accounts:

However, you can only view your existing email accounts, see their quota, and delete the unnecessary ones.
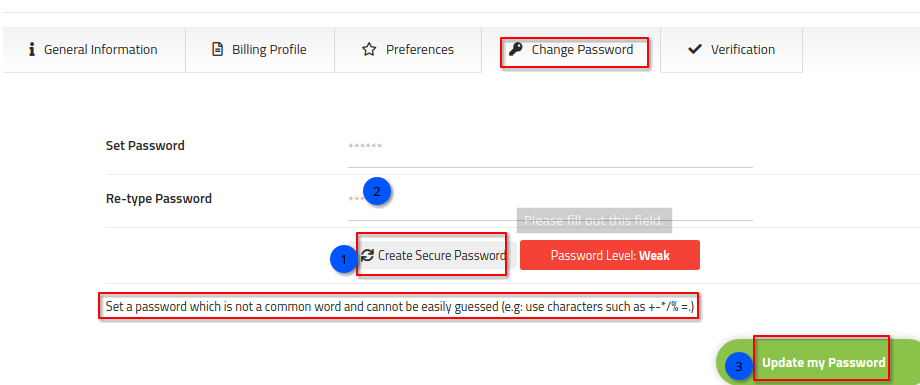
Change Password tab
This is for changing your hosting account’s user password as depicted below:

We always recommend using the password generated from the Password Generator (here Create Secure Password button) and following the directions at the bottom. The steps (1 and 2) are shown for setting up/resetting the password.
Cancellation Request tab
This is for canceling your service(s). You have two options – cancel immediately or cancel on the due date.

Manage Domain Registration Services (My Services > Domain Registration)
Clicking on Domain Registration service (option B mentioned initially in this article) will bring the following page:

You will see the Order ID, Service (type) (co.za domain registration here), Amount, Next Due Date, and Status for your domain(s). Clicking on the Manage button (point 2 in the third image from the top of this article) will bring the domain registration service management options.
Details tab
You will land on the Details tab like you did for Web Hosting Service:

Here you have options to renew your domain (by Renew Now* button), see the General Information (as shown) and the hyperlink to the corresponding invoice of this service.
The other tabs, Additional Services, and Cancellation Request, are for the same purpose as they were for Web Hosting management, aforementioned.
* Clicking on the Renew Now button will show you a drop-down menu with the period (which is usually a year for the domain registration) and the amount for the renewal. The rest of the process will be simple.
Manage your Support Desk Correspondence (Support)
Clicking on the Support link on the left pane of the client area will bring the following page for you:

It will list all of your tickets with their ID, Subject, Creation date, Status, and Manage options. You can open a new ticket from here (Open Support Ticket option on top-right), can view your tickets and respond to them, etc.
My Account > Account Details
Clicking on My Account will show the sections for you as shown below:

You will land in the “Account Details” section and see the General Information tab with the details depicted above.
Billing Profile tab
This is the place where you can set your address and add/delete more than one address or “profile” and can set the one profile as your ‘Default Billing Profile’ if you have more than one.

Preferences tab
Here you have the options to subscribe to our promotional notifications, and set your currency and language:

Change Password tab
This is for setting/resetting your Client Portal password:
We recommend the same practice for your client portal password as we do for your hosting account or other passwords.
Verification tab
This is for verification purposes. When you sign up for the first time, the system will ask you to click on the URL sent to your email address using which you signed up; upon clicking that URL your account will be verified. This tab shows whether the status of your account is verified or not.

When you click on the man face icon on the top-right of the screen you will also see similar options as you have seen in previous tabs:

Besides the man-face icon, there are icons for the bell (showing the number of unread notifications if there are any), a shopping cart icon, for showing the number of items (in case you ordered a new service (using the ‘Buy New Service’ option on the top left of the client area in the left-pane) or add-on or if opted for an upgrade)) and three letters for your currency (e.g., ZAR for Rands) you set in your Billing Profile (however you can click on it to change it to some other currency, temporarily, if you like).
My Account > My Invoices
This section shows your paid/outstanding/canceled invoices:

There are columns for Invoice, Creation Date, Last Payment Date, Amount, Status, and Manage. Clicking on the View button under Manage will open your invoice in a new tab and if that is not paid, will provide you the options for how you can pay. Please refer to our Billing related articles for payment options.
My Account > My Messages
My Messages section will show you the internal status messages of the client management system or CRM:

As shown, whenever someone from support responds, a ticket is closed or a service is suspended or activated, etc., such messages will appear here. You can check these status messages in case you missed correspondence from the support desk and want to see your service status or want to search for some action taken from the CRM side automatically.
As you have noticed, in every image there is a chat balloon in the middle right of the screen. You can chat with us anytime by clicking on it much like you can do when you visit our website – https://www.webdesignlabs.co.za