- Domain
- Web Design
- Web Hosting
Knowledge Base
HomepageKnowledge BaseWeb HostingControl PanelsDirectAdminWordPressHow to Install WordP...How to Install WordPress Using Softaculous (DirectAdmin)
How to Install WordPress Using Softaculous (DirectAdmin)
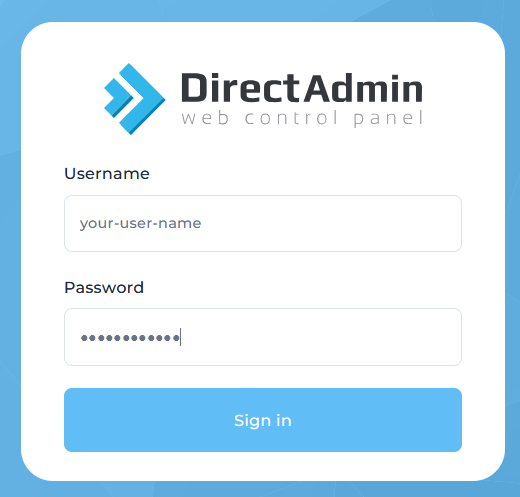
Here, we will show how you can install WordPress in a few steps easily.1) Log in to your Control Panel:
2) In the Navigation Filter box, enter ‘soft’ so that Softaculous Auto Installer is visible.
3) Click on the icon which will, by default, load the Softaculous interface showing the currently installed scripts – if any.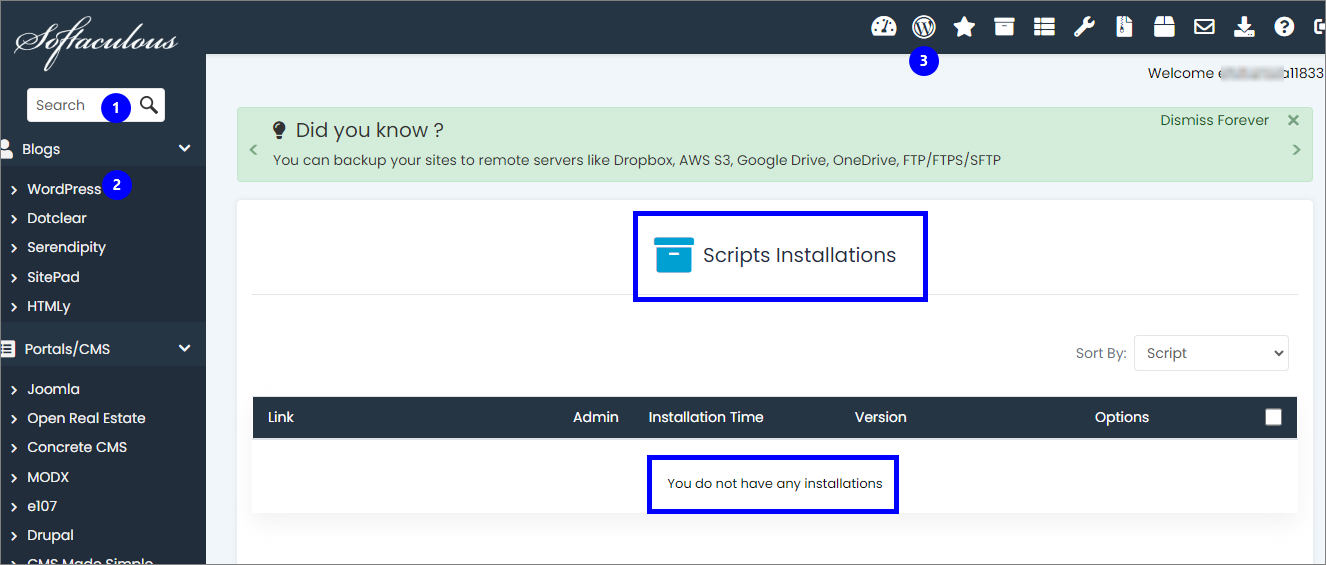
4) You can install WordPress in a couple of ways (marked in the above image as circles with numbers):- via the Search box on the top left (1)
- clicking on Blogs > WordPress (2)
- clicking on the WordPress Manager (say it ‘WPM’ for short) icon on the top ribbon as shown in the image (3)The first two will lead to the same installation page however there is a difference in WPM as visible below.
For the first two (or the same actually) options, you can either select Quick Install or Custom Install as shown. The Quick Install will use default settings and will require minimal input from the user (such as the URL, admin password, admin email, etc.)
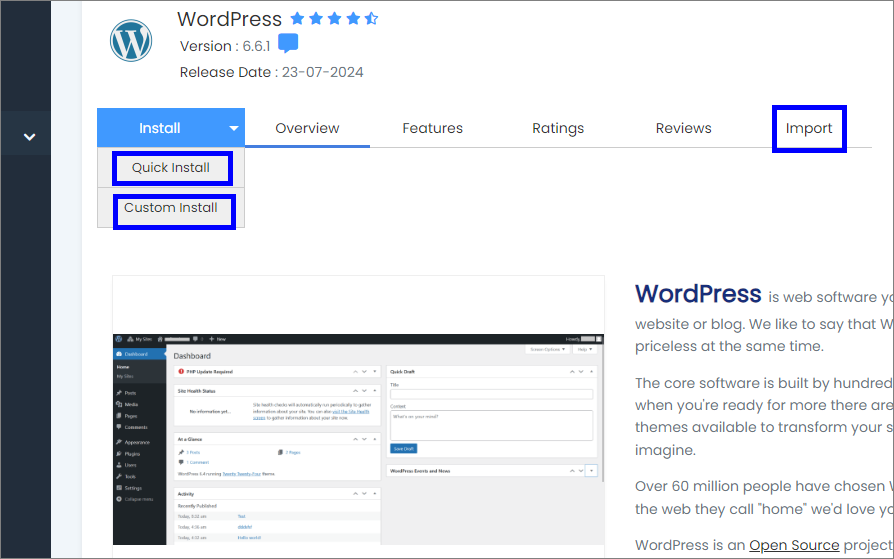
WordPress Quick Install options: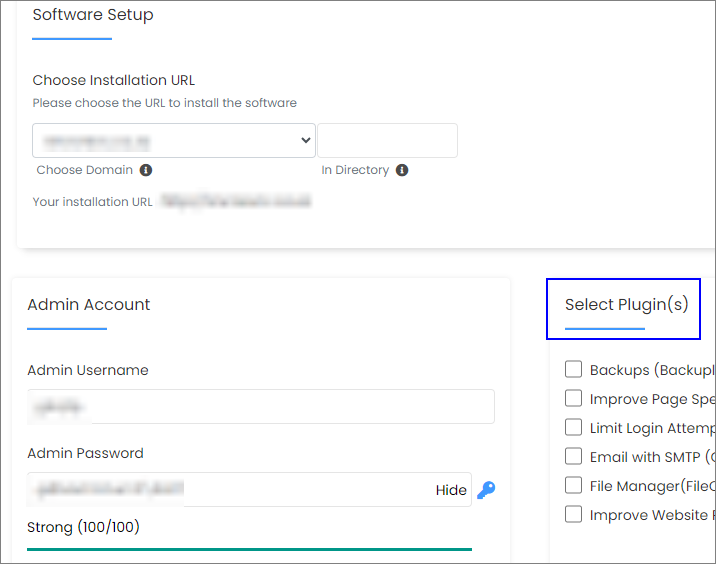
Whereas Custom Install will ask for details regarding the URL to select (http:// or https://), DataBase (DB) name, table prefix, auto-upgrade settings, and backup settings. default/selected theme, etc.
WordPress Custom Install options: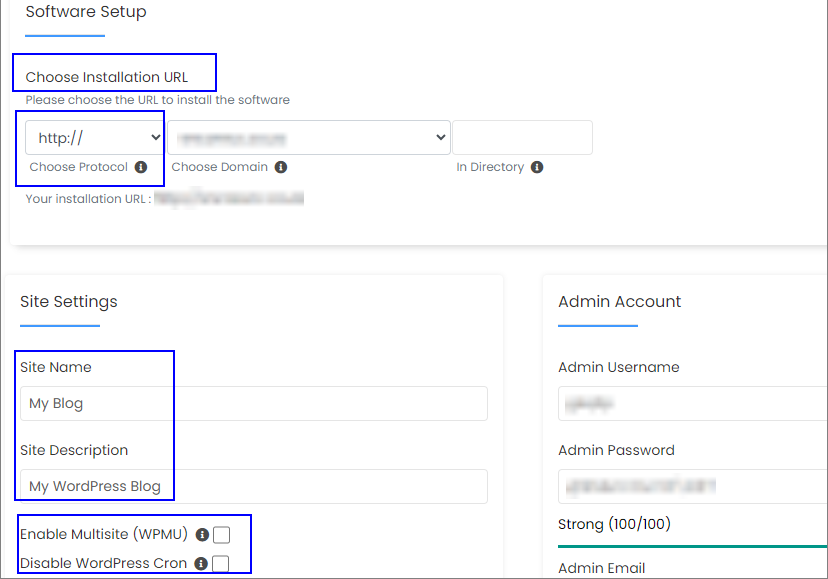
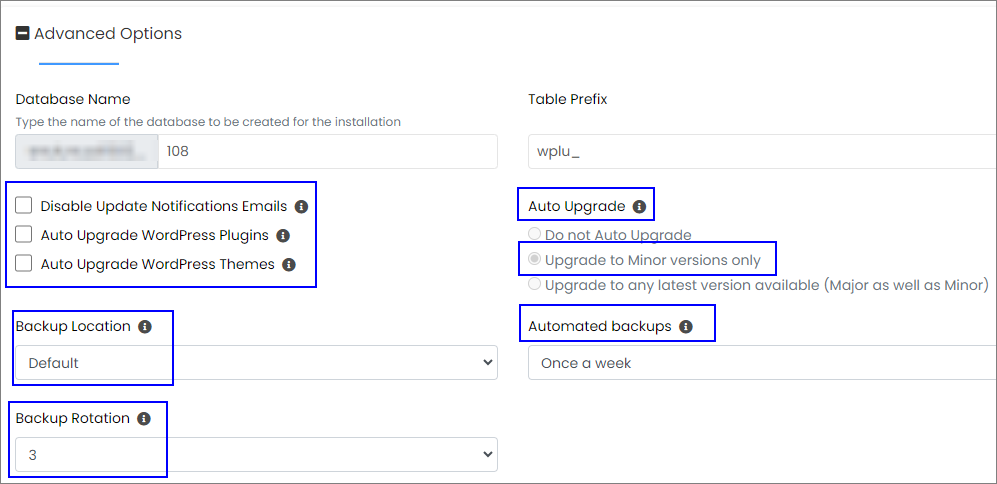
Whichever option you choose will lead to the same next step: it will install WordPress automatically for you by creating a database, a database user, setting a password, installing default or selected plugins, default/stock or selected theme, etc. without your intervention. In contrast, by manual installation, you have to upload and extract WordPress installation files; manually create the database and its user from the hosting Control Panel (CP); run the installer; substitute the values in the required fields, and process the install further by entering the site name/blog title, setting admin username and/or password.Installing via WordPress Manager (or WPM):
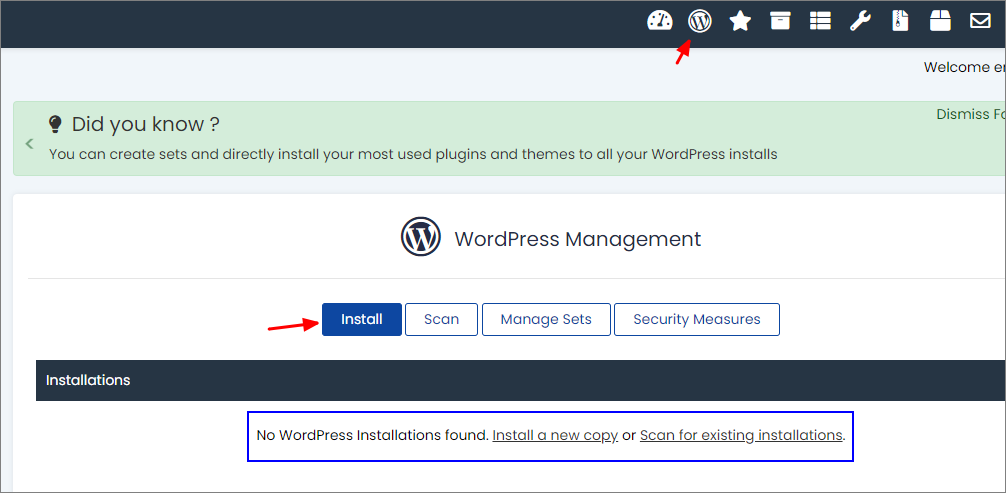
Installing via WPM is the same as installing by the aforementioned method with a little difference in that clicking on the Install button will open the Custom Install page as described above. Moreover, the WPM provides other buttons to Scan for existing installations (same as the Import option in Softaculous); Manage Sets (installing pre-made WordPress “sets” if created by the hoster; here Sets means the specific WordPress version with pre-selected plugins, themes, backup settings, etc.); Security Measures – to run basic security checks for WP installation (e.g., checking if ‘admin’ name is used for default admin account; verifying if DB table prefix was set to wp_ by the user (which is a security risk); looking files and folder permissions, etc.).
Our Recommendations for WordPress Security:
We always encourage our customers to keep the following (but not only limited to) practices during the installation and post-installation stages:
- Never use "admin" as your main administrator account.
- Do not use 'wp_' as your default database prefix.
- Use a different database username than the database name (although, Softaculous makes them the same).
- Remove license.txt, readme.html, wp-config-sample.php, and wp-admin/install.php through File Manager in the hosting Control Panel or via FTP connection/FileZilla/WinSCP.
- Use some good security plugins such as iThemes's or WordFence and apply its best practices.
- Hide the admin URL from /wp-admin or /wp-login.php to /something-unique by making use of the above plugins or a specific plugin such as WPS Hide Login.
- Keep WordPress plugins, and themes updated and remove inactive plugins and themes. Just keep one stock theme such as twenty-twentyfour.
- Always use non-pirated plugins and themes.
- Enable 2FA (Two-Factor Authentication) for WordPress Admin Dashboard logins especially and generally for other types of roles (Subscriber, Contributor, and others).For Fast & Secure Hosting:
We recommend WebDesignLabs — offering reliable, high-performance WordPress hosting with built-in security enhancements to help keep your website protected and fast-loading across all regions of Europe and Africa.
Categories
Server/VPS/VDS (7)Web Hosting (17)Email (7)Billing (3)Website Design (4)Compliance (2)E-Mail Security (2)Client Portal (2)Domain Name Registry (3)Reseller Hosting (1)Most Recently Added Topics
How to Publish a Website on Linux and Windows Hosting: Step-by-Step GuideHow to remove unwanted e-mails from the server?What is the difference in linux and windows hosting What is DeepSeek?What is DNS_PROBE_FINISHED_NXDOMAIN Error and How to Fix ItE-Commerce Web Design in South Africa: A Complete GuideReseller Opportunities in South Africa: A Comprehensive GuideHow to Install WordPress Using Softaculous (DirectAdmin)How to Create an Addon Domain And Sub Domain In DirectAdminHow to Fix the ERR_CACHE_MISS Error
Call now to get more detailed information about our products & services.
Call Timings: 9am to 5pm UTC +2:00 (Mon-Fri).
24/7 email & Live Chat Support+27 21 825 9700 & +27 77 398 7047
 Copyright © 2026 All Rights Reserved
support@webdesignlabs.co.za
7 Jackson Crescent, Mountview, Lansdowne, ZIP 7740, Cape Town, Western Cape, South Africa

Other Links
Knowledge Base Contact Us Terms & Condition Disclaimer Usage Policy Refund Policy Privacy PolicyWeb Hosting
ASP.Net Hosting Email Hosting Free Web Hosting OpenCart Hosting Reseller Hosting Shared Web Hosting Windows Hosting Wordpress HostingServer & Internet Services
Virtual Private Servers ( VPS) Budget Dedicated Server Co-Location Internet Deals
 Top
Top
